Introduction
Hey there! Ever looked at a cool website and thought, "How the heck did they make that?" Well, one of the secret ingredients is something called the <section> tag in HTML. It's like the unsung hero of web design, helping to organize content and make websites look awesome. Whether you're a coding pro or just starting out, understanding this little tag can make a big difference in how your website looks and works.
In today's world where everyone's glued to their phones and tablets, making websites that look good and work well is super important. That's where the <section> tag comes in handy. It's not just about making things pretty - it also helps search engines understand your site better, which is a big deal if you want people to find you online.
So, grab a coffee (or your favorite drink), get comfy, and let's dive into the world of the <section> tag in HTML. Trust me, it's more interesting than it sounds!
What is the <section> Tag?
Okay, so what's the deal with this <section> tag? Think of it as a way to organize your website's content, kinda like how you'd organize a book into chapters. It's part of HTML5, which is the latest version of the language used to build websites.
The <section> tag is what we call a semantic element. Don't worry, it's not as complicated as it sounds. It just means that this tag gives meaning to the content it wraps around. It tells both web browsers and developers, "Hey, this chunk of content is a standalone section that's all about one topic."
Imagine your website is like a library. Each <section> tag is like a shelf dedicated to a specific type of book. This organization doesn't just make things look neat - it helps visitors find what they're looking for more easily, and it even helps search engines understand your site better.
When to Use the <section> Tag
So, when should you actually use this <section> tag? Great question! It's pretty versatile, but knowing when to use it can make your HTML more meaningful and easier to understand. Here are some common situations where the <section> tag comes in handy:
- When You're Covering Different Parts of a Topic: Let's say you're writing a blog post about dogs. You might have sections for breeds, training tips, and health care. Each of these could be wrapped in a <section> tag.
- Breaking Up a Long Article: If you've got a really long article, using <section> tags can help break it into more manageable chunks. It's like creating chapters in a book.
- Grouping Related Content: Maybe you've got a bunch of testimonials or a list of product features. These are perfect candidates for <section> tags.
But here's the thing - you don't want to go overboard. It's important to know the difference between <section>, <div>, and other tags like <article>, <header>, and <footer>. While <div> is like a blank container, <section> actually tells us something about the content inside it.
Structure and Semantics of the <section> Tag
Alright, let's break down how this <section> tag actually works and why it's so useful. It's not just about throwing tags around - there's a method to the madness!
Semantic Meaning
The <section> tag is like a signpost that says, "Hey, all the stuff in here is related and it's an important part of the page." This is super helpful for both humans reading your code and machines (like search engines) trying to understand your website.
Hierarchical Organization
Think of your HTML document like a family tree. The <section> tag helps keep this family tree organized. It's like creating branches that group related content together. This makes your website's structure clearer and easier to navigate.
Accessibility
Here's a cool thing - using <section> tags can actually make your website more accessible to people with disabilities. Screen readers and other assistive technologies can use these tags to help users navigate your site more easily. It's like adding Braille to your website!
Nesting Structure
You can put <section> tags inside other <section> tags, kind of like Russian nesting dolls. But be careful not to go overboard - too much nesting can make your code messy and hard to read.
Examples of <section> Tag Usage
Let's get practical and see how we can actually use these <section> tags in real life. I'll show you some examples that'll make it all click.
Using <section> for Different Website Sections
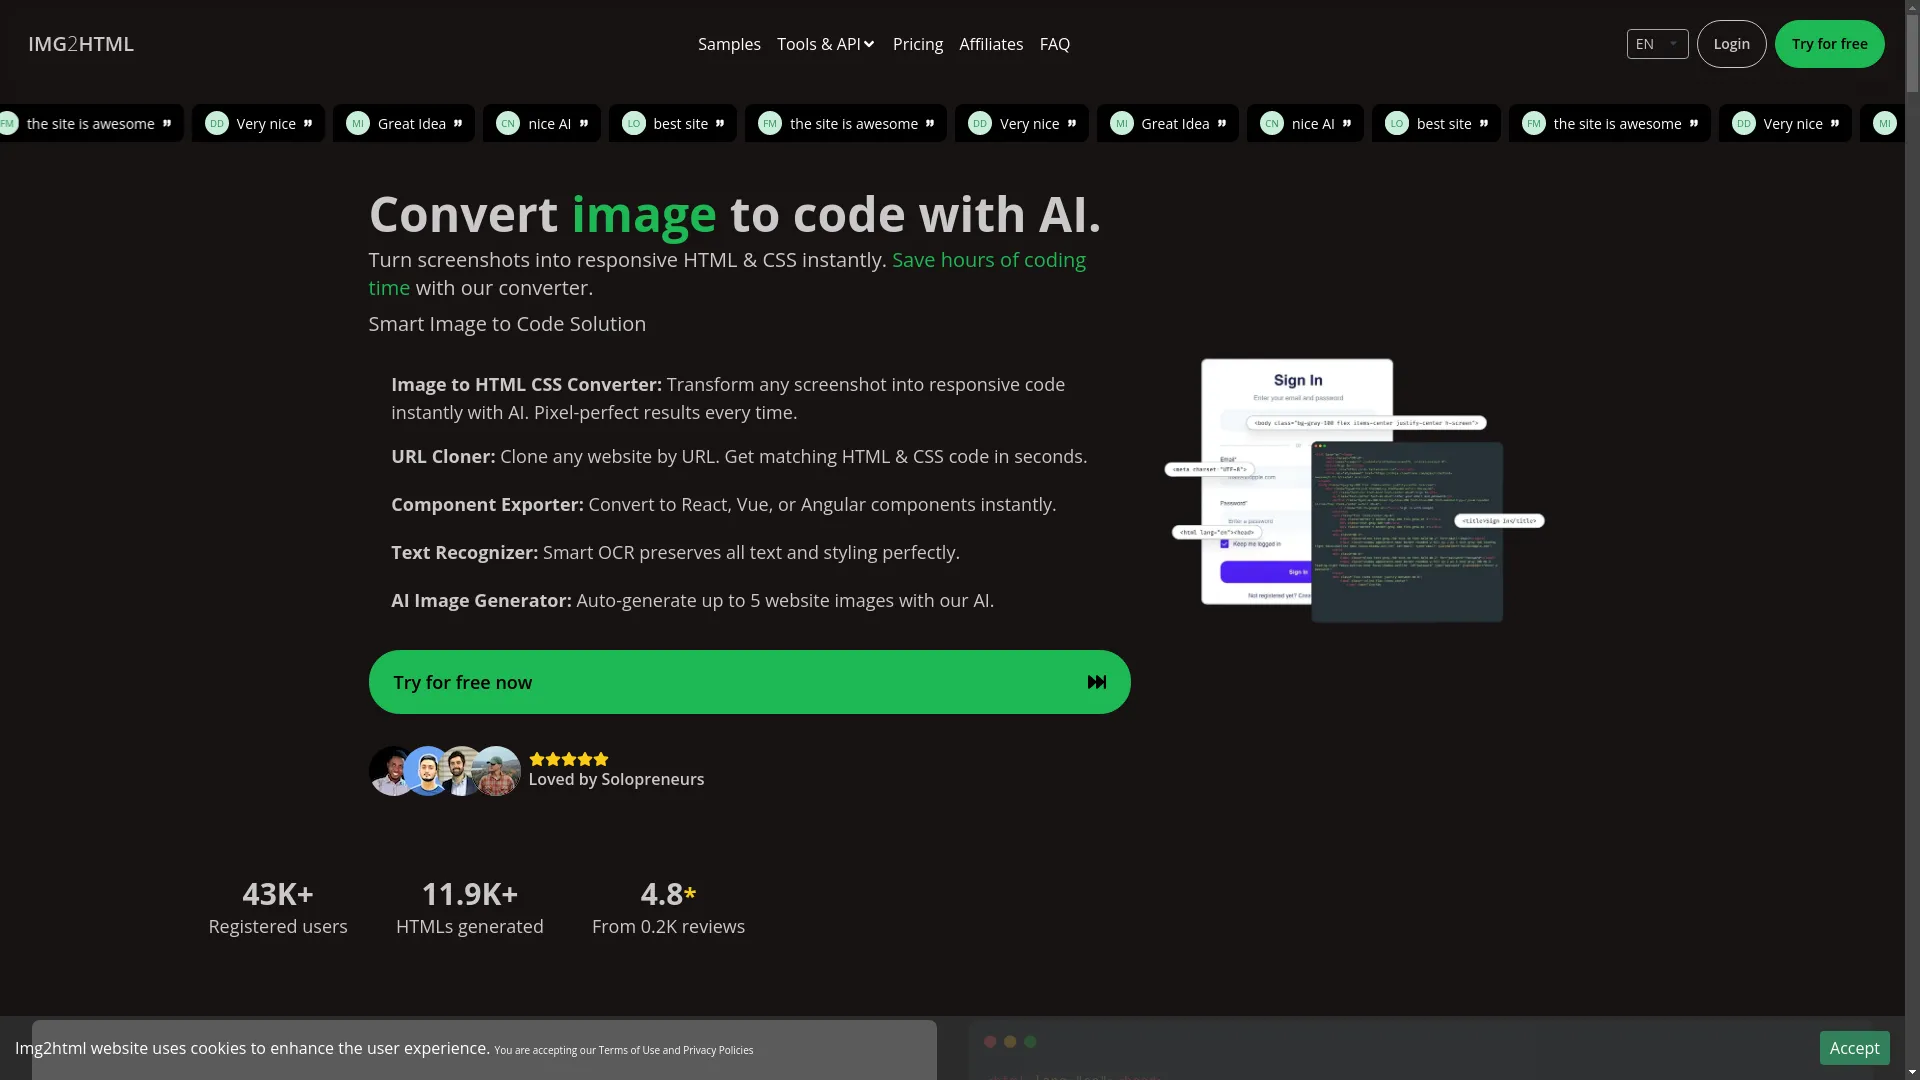
Imagine we're building a website for a cool AI tool like Img2html. Here's how we might structure different parts of the webpage using <section> tags:
<!DOCTYPE html>
<html lang="en">
<head>
    <meta charset="UTF-8">
    <title>Img2html - Turn Pictures into Code with AI</title>
    <link rel="stylesheet" href="styles.css">
</head>
<body>
    <header>
        <h1>Turn Pictures into Code with AI</h1>
        <nav>
            <ul>
                <li><a href="#features">Cool Stuff</a></li>
                <li><a href="#how-it-works">How It Works</a></li>
                <li><a href="#pricing">Pricing</a></li>
                <li><a href="#testimonials">What People Say</a></li>
                <li><a href="#contact">Get in Touch</a></li>
            </ul>
        </nav>
    </header>

    <section id="features">
        <h2>Smart Picture to Code Solution</h2>
        <p>Turn any screenshot into responsive HTML & CSS in a snap with our converter.</p>
        <!-- List of cool features -->
    </section>

    <section id="how-it-works">
        <h2>How Does It Work?</h2>
        <p>Our AI looks at your pictures and spits out clean, responsive code. It's like magic!</p>
        <!-- More details on how it works -->
    </section>

    <section id="pricing">
        <h2>Pricing Plans</h2>
        <p>Pick a plan that fits your needs and start turning pictures into code without breaking a sweat.</p>
        <!-- Pricing details -->
    </section>

    <section id="testimonials">
        <h2>What Our Users Think</h2>
        <blockquote>
            <p>"IMG2HTML is awesome! It's saved me so much time coding."</p>
            <footer>— Alex G., Teacher</footer>
        </blockquote>
        <!-- More happy customer quotes -->
    </section>

    <footer>
        <p>© 2024 Img2html. All rights reserved.</p>
    </footer>
</body>
</html>
In this example:
- <section> each represents a different chapter in our website's story: Features, How It Works, Pricing, Testimonials.
-
The
idattributes make it easy to link to specific parts of the page. - This structure makes the code easier to read and update. It's like having a well-organized closet!
Practical Example: Structuring Img2html Content
Let's zoom in on how we can use the <section> tag to organize Img2html's content, using some of the info you gave me.
<section id="features">
    <h2>Smart Picture to Code Solution 🖼️</h2>
    <p>Turn any screenshot into responsive HTML & CSS in a snap with our converter. Save hours of coding time with our AI-powered tool.</p>
    <ul>
        <li><strong>Picture to HTML CSS Converter:</strong> Perfect results every time.</li>
        <li><strong>URL Copier 🔗:</strong> Copy any website by URL and get matching HTML & CSS code in seconds.</li>
        <li><strong>Component Exporter 🎨:</strong> Turn into React, Vue, or Angular components instantly.</li>
        <li><strong>Text Finder 🔍:</strong> Smart OCR keeps all text and styling just right.</li>
        <li><strong>AI Picture Maker 🌄:</strong> Auto-make up to 5 website pictures with our AI.</li>
    </ul>
    <a href="#try-free" class="cta-button">Try for free now</a>
</section>
In this bit:
- The <section> groups all the feature-related stuff together.
- We've thrown in some emojis to make it more fun to look at.
- Clear headings and bullet points make it easy to read.
This setup not only helps users find what they need, but it also helps search engines understand what's important on the page, which could boost your website's ranking.
Best Practices for Using the <section> Tag
Alright, let's talk about how to use the <section> tag like a pro. Following these tips will help keep your HTML clean, organized, and working well for everyone.
1. Always Start with a Heading
Every <section> should kick off with a heading (that's <h1> to <h6>). It's like giving each section a title, which helps people (and search engines) understand what's coming up.
<section>
    <h2>Our Cool Stuff</h2>
    <p>Check out all the awesome things we offer.</p>
</section>
2. Group Related Content
Make sure everything inside a <section> is about the same topic. It's like keeping all your socks in one drawer - it just makes sense.
- Good Practice: A <section> about customer reviews should only have review stuff in it.
- Bad Practice: Mixing reviews with pricing info in the same <section>. That's just confusing!
3. Don't Overdo It
The <section> tag is cool, but don't go crazy with it. Use it for important groupings and stick with <div> for general styling stuff.
<div class="highlight-box">
    <p>This text stands out!</p>
</div>
4. Nest Them Properly
If you need sections within sections, that's cool. Just make sure it makes sense and doesn't get too complicated.
<section>
    <h2>Blog Posts</h2>
    <section>
        <h3>Latest Web Dev Trends</h3>
        <p>All about the newest web dev stuff.</p>
    </section>
    <section>
        <h3>AI in Coding: What's the Deal?</h3>
        <p>How AI is changing the coding game.</p>
    </section>
</section>
5. Make It Accessible
Sometimes you might need to add extra info to help people using screen readers. But if you use <section> tags right, you won't need to do this as much.
<section aria-labelledby="features-heading">
    <h2 id="features-heading">Features</h2>
    <!-- Feature stuff goes here -->
</section>
Common Mistakes to Avoid
Even when we try our best, it's easy to make mistakes with HTML tags. Here are some common oops moments with the <section> tag and how to avoid them:
1. Using <section> Instead of <div> for Styling
A lot of people use <section> just to style things, but that's not what it's for. <section> is about meaning, not looks.
<section class="sidebar">
    <!-- Sidebar stuff -->
</section>
Use <aside> for sidebars - it's more accurate:
<aside class="sidebar">
    <!-- Sidebar stuff -->
</aside>
2. Forgetting Headings in <section>
Skipping the heading in a <section> is like having a book chapter with no title. It just doesn't work well.
<section>
    <p>Content without a heading. Oops!</p>
</section>
Proper example:
<section>
    <h2>Content Heading</h2>
    <p>Content with a proper heading. Nice!</p>
</section>
3. Too Many Nested <section> Tags
Nesting <section> tags is okay sometimes, but don't go overboard. It can make your HTML messy and hard to follow.
<section>
    <section>
        <section>
            <h2>Way Too Deep</h2>
            <p>This is getting confusing.</p>
        </section>
    </section>
</section>
Keep it simple and meaningful:
<section>
    <h2>Main Section</h2>
    <section>
        <h3>Subsection</h3>
        <p>This makes more sense.</p>
    </section>
</section>
4. Using <section> for Everything
Don't use <section> when a simple <div> would do. <section> is for grouping related content, not just any old thing.
<section class="container">
    <!-- Just some random content -->
</section>
Proper usage:
<div class="container">
    <!-- Generic content that doesn't need semantic meaning -->
</div>
5. Ignoring Accessibility
Don't forget about making your site accessible to everyone. Sometimes you need to add extra info to help people using screen readers.
Wrong: Skipping headings or accessibility attributes when they're needed.
Right: Including headings and labels that help everyone understand your content:
<section aria-labelledby="features-heading">
    <h2 id="features-heading">Features</h2>
    <!-- Feature content -->
</section>
Accessibility Considerations
Making websites that everyone can use, regardless of their abilities, is super important. The <section> tag plays a big role in this. Here's how to use it to make your site more accessible:
1. Use Headings Properly
As we've said before, each <section> should start with a heading. This helps people using screen readers understand how your content is organized.
<section>
    <h2>Features</h2>
    <!-- List of features -->
</section>
2. ARIA Landmarks
Sometimes, adding ARIA (Accessible Rich Internet Applications) roles can make your <section> tags even more helpful for accessibility. For example, you can use
aria-labelledby
to connect a <section> with its heading.
<section aria-labelledby="testimonials-heading">
    <h2 id="testimonials-heading">What People Say</h2>
    <!-- Testimonials content -->
</section>
3. Logical Content Order
Make sure your <section> tags follow a logical order in your HTML. This helps users understand how the content flows from one part to another.
4. Avoid Repeating Stuff
Don't use multiple <section> tags for the same content. It can confuse users and mess up the content flow.
Wrong:
<section id="features">
    <section>
        <h2>Features</h2>
        <!-- Feature content -->
    </section>
</section>
Right:
<section id="features">
    <h2>Features</h2>
    <!-- Feature content -->
</section>
5. Use Clear IDs and Classes
Give your <section> tags meaningful IDs and classes. This helps with styling and also benefits users who rely on assistive technologies.
<section id="pricing-plans">
    <h2>Pricing Plans</h2>
    <!-- Pricing content -->
</section>
Styling <section> with CSS
Now, let's talk about making your <section> tags look good. CSS is your friend here - it's what makes your website pop visually.
1. Basic Styling
You can add padding, margins, background colors, and borders to make your sections stand out.
section {
    padding: 20px;
    margin: 20px 0;
    background-color: #f9f9f9;
    border-left: 4px solid #007BFF;
}
2. Make It Responsive
Make sure your <section> elements look good on all devices. Use CSS Flexbox or Grid to create layouts that adjust to different screen sizes.
Example with Flexbox:
#features {
    display: flex;
    flex-wrap: wrap;
    gap: 20px;
}

.feature-item {
    flex: 1 1 200px;
    background-color: #ffffff;
    padding: 15px;
    border: 1px solid #e0e0e0;
    border-radius: 5px;
}
3. Visual Hierarchy
Use different text sizes and spacing to show what's most important in each section.
section h2 {
    font-size: 2em;
    color: #333333;
    margin-bottom: 10px;
}

section p {
    font-size: 1em;
    color: #666666;
}
4. Add Some Flair
You can use background images or patterns to make sections more interesting. Just make sure it doesn't make the text hard to read.
#testimonials {
    background-image: url('testimonial-bg.png');
    background-repeat: no-repeat;
    background-position: center;
    background-size: cover;
    padding: 40px 20px;
}
5. Interactive Elements
Add things like carousels or accordions within your sections to make them more engaging.
<section id="features">
    <h2>Features</h2>
    <div class="feature-carousel">
        <!-- Carousel items -->
    </div>
</section>
CSS:
.feature-carousel {
    display: flex;
    overflow-x: scroll;
    gap: 15px;
}
6. Different Themes for Different Sections
Give each section its own look to make your site more interesting.
#pricing {
    background-color: #007BFF;
    color: #ffffff;
}

#testimonials {
    background-color: #f1f1f1;
    color: #333333;
}
7. Use CSS Variables for Consistency
Define colors, fonts, and spacing as variables to keep everything consistent across your site.
:root {
    --main-color: #007BFF;
    --background-color: #ffffff;
    --main-font: 'Arial, sans-serif';
}

section {
    font-family: var(--main-font);
}

#features {
    background-color: var(--background-color);
    border-left: 4px solid var(--main-color);
}
Advanced Uses: Integrating with JavaScript Frameworks
If you're using modern JavaScript frameworks like React, Vue, or Angular, you can still use <section> tags to keep your code organized and meaningful.
1. React
In React, you can use <section> tags within your components to keep things structured.
import React from 'react';

function Features() {
    return (
        <section id="features">
            <h2>Smart Picture to Code Solution 🖼️</h2>
            <p>Turn any screenshot into responsive HTML & CSS in a snap with our converter.</p>
            <!-- Feature list -->
        </section>
    );
}

export default Features;
2. Vue
Vue also works well with <section> tags, helping you keep your components organized.
<template>
    <section id="testimonials">
        <h2>What Our Users Think</h2>
        <!-- Testimonials content -->
    </section>
</template>

<script>
export default {
    name: 'Testimonials'
}
</script>

<style scoped>
    /* Styles for the Testimonials section */
</style>
3. Angular
In Angular, you can use <section> tags in your templates to structure your components.
<!-- features.component.html -->
<section id="features">
    <h2>Features</h2>
    <p>Details about our cool features.</p>
    <!-- Feature list -->
</section>
4. Why Use <section> in Frameworks?
- Easier to Read: Semantic tags make your code easier to understand, which is great when you're working in a team.
- Better for SEO: Search engines love well-structured content, and <section> tags help with that.
- Easier to Update: When your code is well-organized, it's easier to make changes later on.
5. Example: Building a React App with <section>
Let's look at a simple React app for Img2html to see how <section> tags fit in.
App.js:
import React from 'react';
import Header from './components/Header';
import Features from './components/Features';
import HowItWorks from './components/HowItWorks';
import Pricing from './components/Pricing';
import Testimonials from './components/Testimonials';
import Footer from './components/Footer';

function App() {
    return (
        <div>
            <Header />
            <main>
                <Features />
                <HowItWorks />
                <Pricing />
                <Testimonials />
            </main>
            <Footer />
        </div>
    );
}

export default App;
Features.js:
import React from 'react';

function Features() {
    return (
        <section id="features">
            <h2>Smart Picture to Code Solution 🖼️</h2>
            <p>Turn any screenshot into responsive HTML & CSS in a snap with our converter.</p>
            <ul>
                <li>Picture to HTML CSS Converter</li>
                <li>URL Copier 🔗</li>
                <li>Component Exporter 🎨</li>
                <li>Text Finder 🔍</li>
                <li>AI Picture Maker 🌄</li>
            </ul>
            <a href="#try-free" className="cta-button">Try for free now</a>
        </section>
    );
}

export default Features;
This way of organizing things makes your code easier to read, update, and optimize for search engines.
SEO Benefits of Using <section> Properly
Using <section> tags the right way can actually help your website show up better in search results. Here's how:
1. Better Content Structure
Search engines like Google try to understand how your content is organized. Using <section> tags helps them figure out what parts of your page are about what topics.
Example:
<section>
    <h2>Customer Reviews</h2>
    <!-- Reviews content -->
</section>
A <section> with customer reviews tells search engines "Hey, this part is about what our customers think!"
2. Keyword Focus
Each <section> can focus on specific keywords or topics. This helps search engines understand what your page is about more clearly.
Example:
<section id="features">
    <h2>Smart Picture to Code Solution 🖼️</h2>
    <p>Turn any screenshot into responsive HTML & CSS in a snap with our converter.</p>
    <!-- Feature list -->
</section>
Separate <section> tags for "Features," "Pricing," and "Testimonials" let you optimize each part for different keywords.
3. Easier for Search Engines to Read
Search engines use bots to read your website. A well-structured HTML with <section> tags makes it easier for these bots to understand and index your content.
4. Rich Snippets
While not directly related to <section> tags, using good HTML structure can help you get those cool rich snippets in search results - you know, those fancy boxes with extra info.
<section id="testimonials" itemscope itemtype="http://schema.org/Review">
    <h2>What Our Users Think</h2>
    <blockquote itemprop="reviewBody">
        <p>"IMG2HTML is awesome! It's saved me so much time coding."</p>
    </blockquote>
    <footer itemprop="author">— Alex G., Teacher</footer>
</section>
This structure helps search engines see that this section is all about features, which could help it show up in relevant searches.
5. Better User Experience
Search engines care about user experience. A well-structured site with clear sections helps users find what they need quickly, which search engines like.
6. Mobile-Friendly
Search engines prefer mobile-friendly sites. Using <section> tags properly, along with responsive design, helps make your site work well on mobile devices.
7. Accessibility and SEO
Making your site accessible with semantic HTML like <section> tags can also boost your SEO. Search engines are starting to care more about accessibility.
8. Faster Loading
While <section> tags themselves don't make your site faster, a well-structured HTML can lead to cleaner code, which might load faster. And search engines love fast sites!
9. Better Metadata
Using <section> tags with good titles and descriptions can help search engines understand each part of your content better.
<section id="features">
    <h2>Smart Picture to Code Solution 🖼️</h2>
    <p>Turn any screenshot into responsive HTML & CSS in a snap with our converter.</p>
    <!-- Feature list -->
</section>
10. Internal Linking
<section> tags create natural places for internal links, which can help spread link juice (that's SEO talk for link value) across your site.
<section id="how-it-works">
    <h2>How Does It Work?</h2>
    <p>Our AI looks at your pictures and spits out clean, responsive code. It's like magic! Check out our <a href="#features">awesome features</a>.</p>
</section>
How Tools Like Img2html Assist in Structuring HTML
Tools like Img2html are pretty cool because they help make the whole process of turning designs into actual working code a lot easier. Let's see how Img2html can help with using <section> tags and structuring HTML.
1. Automatic Code Generation
Img2html uses AI to turn pictures into clean HTML and CSS code automatically. This means you don't have to spend hours typing out code by hand.
Example:
<section id="features">
    <h2>Smart Picture to Code Solution 🖼️</h2>
    <p>Turn any screenshot into responsive HTML & CSS in a snap with our converter.</p>
    <!-- Generated feature list -->
</section>
2. Tailwind CSS Support
If you're into Tailwind CSS (it's a popular way to style websites), Img2html can work with that too. It'll add Tailwind classes to your <section> tags.
Example:
<section id="features" class="bg-gray-100 p-6">
    <h2 class="text-2xl font-bold mb-4">Smart Picture to Code Solution 🖼️</h2>
    <p class="text-gray-700">Turn any screenshot into responsive HTML & CSS in a snap with our converter.</p>
    <!-- Tailwind-styled feature list -->
</section>
3. Works on All Devices
Img2html makes sure that the <section> tags it creates work well on phones, tablets, and computers. This is super important these days when everyone's browsing on different devices.
4. Component Exporter
If you're using fancy frameworks like React, Vue, or Angular, Img2html can create <section> tags that fit right into these frameworks.
React Example:
import React from 'react';

function Features() {
    return (
        <section id="features" className="bg-gray-100 p-6">
            <h2 className="text-2xl font-bold mb-4">Smart Picture to Code Solution 🖼️</h2>
            <p className="text-gray-700">Turn any screenshot into responsive HTML & CSS in a snap with our converter.</p>
            <!-- Feature list -->
        </section>
    );
}

export default Features;
5. Fewer Mistakes
When you let a tool like Img2html generate your HTML, you're less likely to make silly typos or forget to close tags. It's like having a really accurate typing buddy.
6. Saves Time
Time is money, right? Img2html can turn designs into code way faster than most humans can type it out. This means you can get your website up and running quicker.
7. Keeps Things Consistent
Img2html makes sure that all your <section> tags follow the same pattern. This is great for keeping your website looking neat and professional.
Example:
<section id="pricing" class="pricing-section">
    <h2>Pricing Plans</h2>
    <!-- Pricing content -->
</section>

<section id="testimonials" class="testimonials-section">
    <h2>What Our Users Think</h2>
    <!-- Testimonials content -->
</section>
8. You Can Still Tweak Things
Even though Img2html generates code automatically, you can still change things if you want. It's like getting a head start on your homework - you still get to add your own touch.
Example:
<section id="features" class="my-custom-feature-section">
    <!-- Content -->
</section>
9. Works with Modern Stuff
Img2html keeps up with the latest in web development. So whether you're using React, Vue, Angular, or whatever's new, it's got you covered.
10. API for Big Projects
If you're working on a big project, Img2html has an API. This means you can automatically generate <section> tags and other HTML elements as part of your development process.
Example:
curl -X POST https://api.img2html.com/generate-html -F '[email protected]' -F 'api_key=your_api_key' -F '[email protected]'
This command would give you the HTML code for the Features section, ready to plug into your website.
Conclusion
Alright, let's wrap this up! We've taken a deep dive into the world of the <section> tag in HTML, and hopefully, you're now feeling like a pro at using it.
Remember, the <section> tag isn't just some random bit of code - it's a powerful tool that helps you organize your website in a way that makes sense to both humans and search engines. It's like the secret ingredient that can make your website not just look good, but work better too.
We've covered a lot - from the basics of what <section> is and when to use it, to more advanced stuff like how it works with JavaScript frameworks and how it can boost your SEO. We've also looked at common mistakes to avoid and best practices to follow.
And let's not forget about tools like Img2html. These kinds of AI-powered helpers can make your life a whole lot easier when it comes to building websites. They're like having a super-smart coding buddy who never gets tired.
The key takeaway? Using <section> tags properly can make your website more organized, easier to read (for both humans and machines), and more accessible to everyone.